
DIY Washi Tailored Bows

THE HOW-TO >
- Washi tape
- scissors
- clear double sided tape, glue dots or glue
How To Do It:
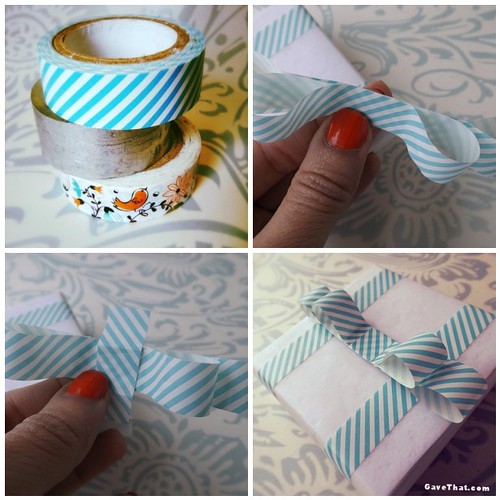
The nice part about Japanese Washi tape is it's light tack like masking tape but it's thicker, sturdier nature makes bows created from it keep their loops perky. Oh, and the designs! They even come glittered.
With this tailored bow style the length of tape needed and amount of loops created will depend on the dimensions of your particular gift box. My little box only needed 2 loops but long boxes, which tailored bows look particularly pretty on, might need 5 or 10 loops on each end. Using Washi tape there I found two ways to make this style bow depending on how big it needs to be.
Small bow like mine: Leave the Washi tape attached to the spool and create two loops on one side by folding the tape back on itself around your finger, then create the small top loop and larger bottom loop on the other side. Cut and adhere underneath.
Larger bows: Create cascading loops by first creating one long loop, then continue folding the Washi tape back on itself to form ever shorter loops on top. Create a set of two and staple the centers of the two halves together.
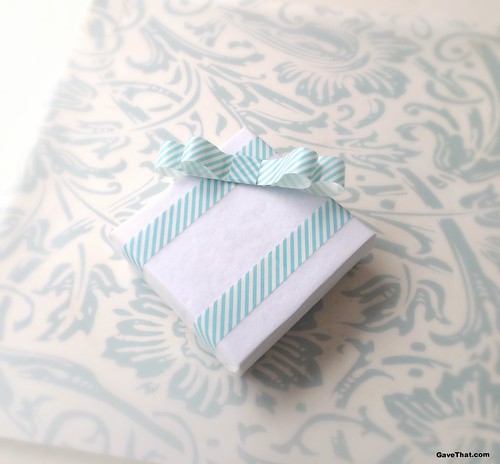
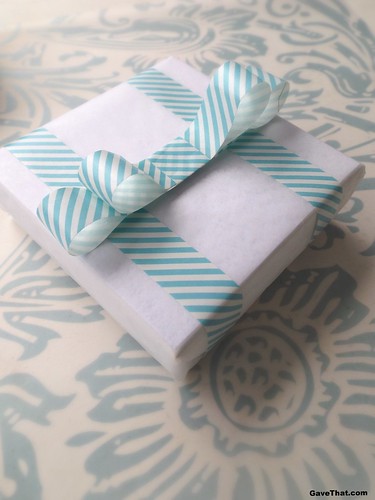
To finish cut a 1 & 1/2 inch length of Washi tape and wrap around the center of your finished bow. Add some double sided tape of a glue dot underneath and it's ready to top that gift! I also added some of the tape in place of ribbon to the gift box itself.
For another style of bow see my previous knotless Washi masking tape gift bow tutorial here.
Image: mam for Gave That


