
DIY Bespoke Bow Ties


The How To:
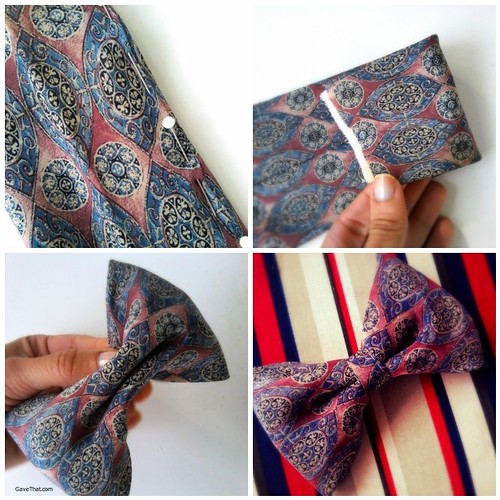
1) Here an old silk necktie is being used but any light to medium weight fabric can work for these. The nice part about neckties is you can use the skinny part as a band to go around the neck. Otherwise a pin packing works great too.
You will need one piece of fabric measuring 6 inches x 10 inches for our bow tie above. Cut another strip of fabric 1 inch x 4 inches.
2) Fold the larger piece of fabric, wrong sides together, in half. Either sew or glue the free edge together leaving a tube of fabric.
3) Flatten the tube of fabric so the seam you've just sewn is straight down the center. Spraying spray starch on the side with the seam (wrong side) can help the finished bow tie hold its shape. Press with an iron.
4) Take each end of the fabric and fold it in on each other. Sew or glue the end together.
5) Take the thin strip of fabric and fold the wrong sides in on one another to form a 1/2 inch tube of fabric. Press flat. Spray the wrong side with the seam with spray starch (optional).
6) Pinch the center of the bow tie together, forming plates and wrap the small strip of fabric around, gluing or sewing to the back. Add a brooch pin back and you're done!

Image: mam for Gave That


