Glu6 x DIY Topiary Place Settings


Visiting the Glu6 site was truly an eye opening experience. Many of us now know the sobering amount of landfill waste that is created during the holidays but something else unsettling happening on a grander scale everyday is the amount of styrofoam waste filling up our landfills. According to Nine Lives, some 30% for something that's only used once to cushion a TV or lamp in a shipping box. This discarded styrofoam is what forms Glu6's clear glue and Craft Paste. Pretty neat. Best of all this stuff really works, each version in its own way, and takes about a day to fully cure.
For this project the Craft Paste is being pressed into action as it was created for porous and semi-porous surfaces such as our dried roses and foam ball. The other clear glue is for non-porous surfaces and can be used for sealing and adding gloss. There is another project planned for that but in the mean time, here's how to create the mini topiary above:
The How-To:

What You Will Need:
- Glu6 Craft Paste
- Small foam balls
- Twigs
- Moss
- Tiny terracotta flower pots
- Dried rose petals or fine potpourri
- Metal paperclip
- Florist putty

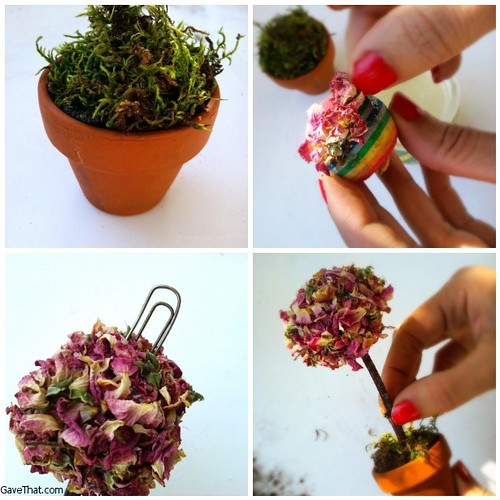
1) Fill the mini terracotta pots with florist putty or a clay to form a stable base. Spread on a bit of the Glu6 Craft Paste and add the moss on top.
2) Spread the Craft Paste on the foam ball in small section and roll in a plate of fine potpourri or rose petals. Set aside and allow to dry over night.
3) Using an Xacto knife carefully poke a slit down into the top of the topiary ball. Insert a metal paper clip in about half way.
4) Taking a twig (in this case about 4 inches long) add a bit of Craft Paste to each end and push one end into the topiary ball and the other into the moss, down into the clay base of the flower pot. Allow to fully cure.
And that's it!

Image: mam for Gave That
